Wednesday, February 4, 2015

Crochet and Paper Flower Wedding Bouquet

Well, I did it: I made my wedding bouquet! AND I made two more for my bridal party. And I'm so happy with them. Thought I'd share the process.

Supplies:

Yarn
Book pages you're willing to rip out and cut up
Scissors
Glue gun
"Pearl" head pins
"Pearl" beads
Green wodden plant stakes
One 8" hard styrofoam ball
Two 6" hard styrofoam balls
Paint to match the colour of your flowers
Green paint
Satin
Lace ribbon
Silver charms

Step 1: Find flowers that you like and can make.

I thought for a while about trying to do an entirely paper flower bouquet because I found this tutorial for paper flowers and fell in love: http://www.100layercake.com/blog/2011/07/22/diy-storybook-paper-roses/#sthash.IHNG1N8o.qjtu

And, since our wedding theme was books and tea, these were doubly perfect. They're not a very quick project, but they aren't difficult and they ARE beautiful.

I'd bought an old book on sailing for almost nothing in anticipation of making the paper flowers. The pages were nice and thick, and not a bright white so they were great. To get the coloured flowers, I bought acrylic paint and watered it down a whole bunch to get the colours I wanted. Then I painted all the pages. The painting (and drying) took longer than any other part of making these flowers. I spent an hour and a half one morning before I realized how long I'd been doing it. And there were many, many other times I spent painting pages. But, very worth it in the end.


I started making them in different sizes and with different shaped petals and with different types of paper. And, like I said, I wanted my whole bouquet to be made of these paper flowers.


Unfortunately for me, I couldn't get them to sit in a nice, tight bouquet. After much agonizing, and considering giving up completely on a handmade  (by me) bouquet, I decided to add some crocheted flowers and see how that went. Which was great because crochet is my favourite craft. 

I thought I had found my perfect crocheted flower (my realistic rose from my previous post: http://tinybubblescrafts.blogspot.ca/2014/04/realistic-rose-free-crochet-pattern.html) but it didn't work in a bouquet either! My heart was broken once more. The flowers were too stiff and too tall to sit nicely in a bouquet on their own and to sit nicely with the paper flowers. 


I realized, to my surprise, that the roll up type rose that you can find everywhere, and that I basically poo-pooed in my previous post causing me to spend hours coming up with my realistic rose pattern, was actually perfect in a bouquet with my favourite paper flowers. So, I made a whole bunch. 


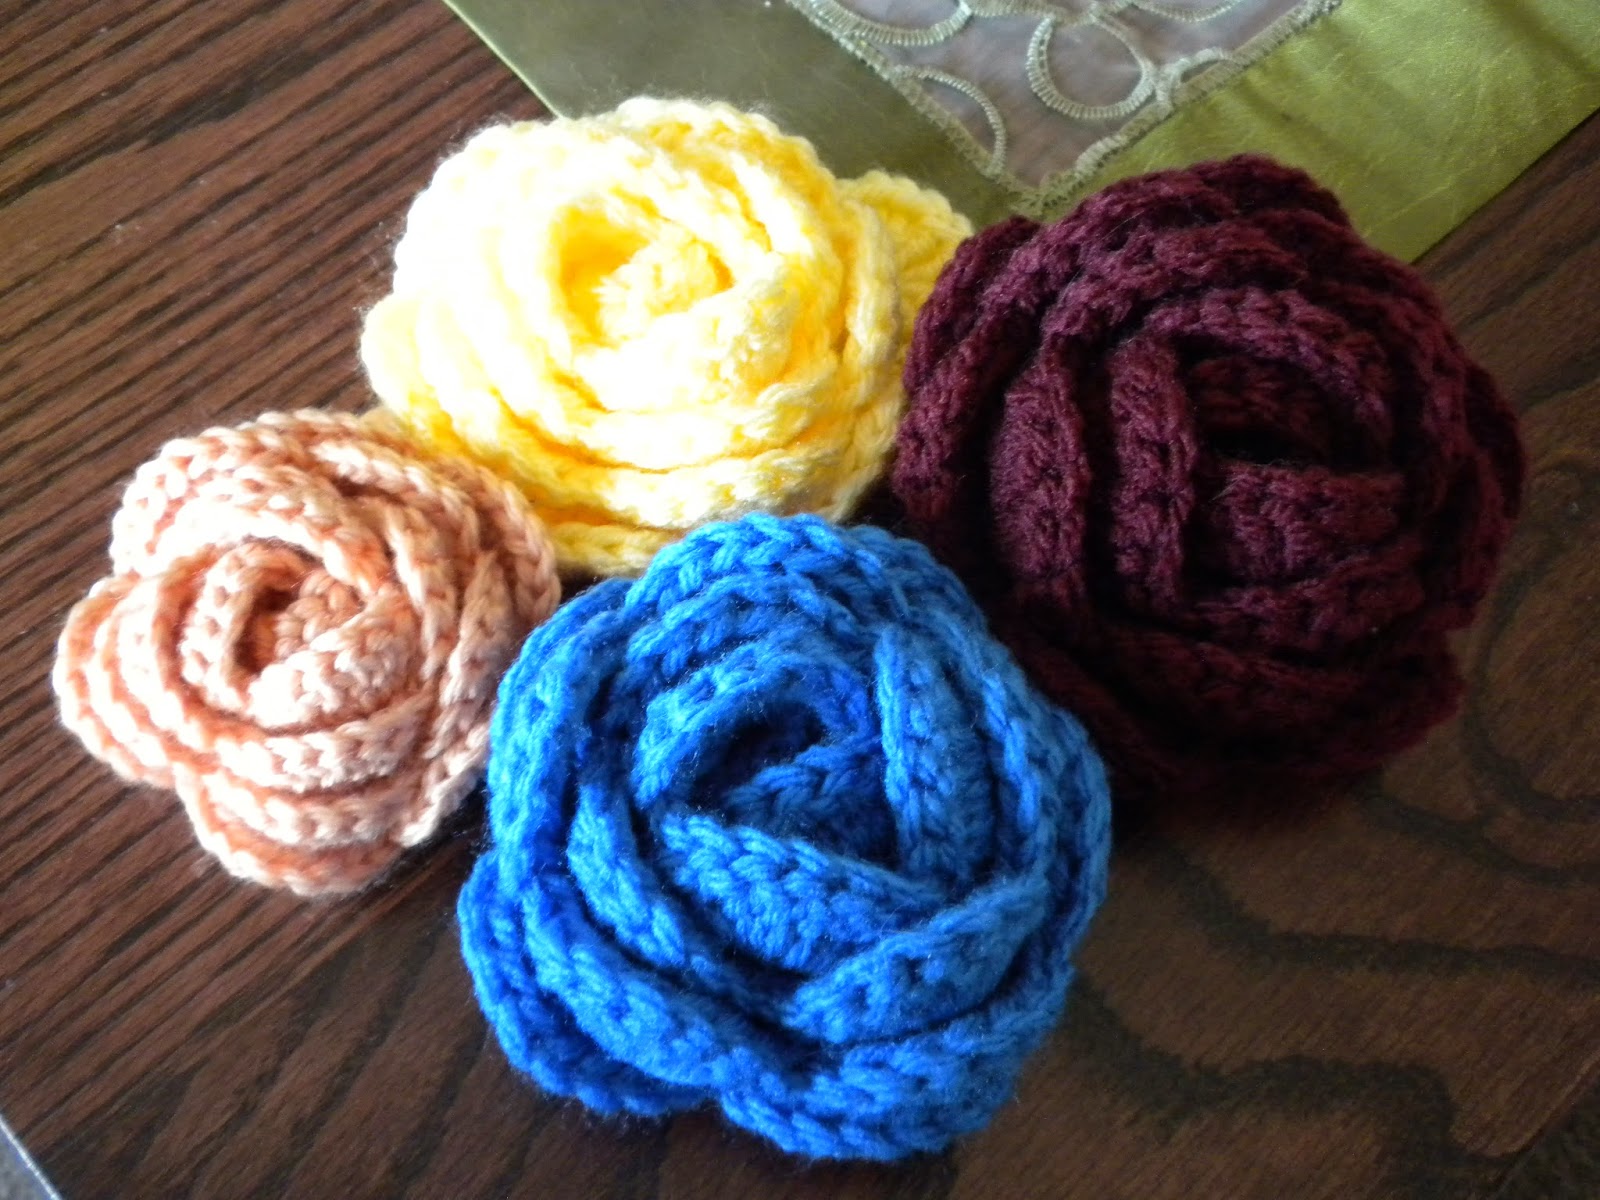
I used this pattern: http://megan.cc/StripMethodRose/

Step 2: Choose your colours. 

I had 4 wedding colours: orange, yellow, burgundy and blue. My best women (I couldn't choose one maid of honour, and best women sounded better than maids of honour) were in two different coloured dresses: one in yellow and one in burgundy. I had planned to wear all four colours in some way. Somehow, I finally decided that my bouquet would be entirely blue (and I had burgundy pearls and yellow in my necklace, and an orange flower for my hair) so I had all four colours. For my ladies, they each were going to have blue necklaces so their bouquets ended up being one in burgundy and orange and one in yellow and orange. 

Step 3: Decide how you will assemble your bouquet. 

Originally I really wanted to have each flower with its own stem, and then wrap the stems together like a real bouquet. But I could not get the flowers to stay tight and nicely arranged while trying to do that. I'd read a lot of blogs about handmade bouquets, and many of them looked down on using styrofoam balls as the base for a bouquet, but that's what I ended up using. 

When I thought about having a real flower bouquet, I always pictured a very rounded bouquet anyway. So I was perfectly happy having such a round bouquet because of the styrofoam ball. 

Then, I bought tons of those little pins with heads that look like pearls, and used them to pin on the crocheted flowers. I used my glue gun to glue them into the bottom of the paper flowers and stuck them on. 


And then I realized that I had to paint the white styrofoam ball blue or you would see the white here and there. So I took out all the flowers I'd pinned in and painted mine blue, and then the other two yellow and burgundy, respectively. 


I'd also decided to use wooden plant stakes as the stems so I painted around where the stakes would go in green, just in case. 

Then, I made more flowers, both crocheted and paper, and gathered some "pearl" beads to put in the center of each flower, and assembled once more. 


Once I got the look I wanted, I set the bouquet aside for a bit. I wanted to put a few bits and pieces I'd collected in the centers of some of the flowers, so I stuck them in temporarily and looked at it each day for a bit, sometimes moving them around. 


And once I'd decided on which ones to use and where, I had to figure out how to use the plant stakes as stems. The bouquet was pretty heavy, and I was worried that the stakes wouldn't be sturdy enough to hold the bouquet up. I was also worried that they wouldn't stay in the ball, and I might have to glue each one in. But, I just started poking them in. And it turns out, not only are they sturdy enough, but they are a b*@#$ to get into the ball, so there's no way they're just going to fall out of it. I had to get my (then) fiancee to help poke some in because they just didn't want to go for me. 


I also found some ivory rose beads at Michael's that I fell in love with, so I wrapped them with wire, wrapped the wire around a head pin and stuck them in a bunch of the flowers. And I hot glued some smaller "pearl" beads into the center of each of the paper flowers. 


Finally, I wanted to wrap the "stems" in satin and then lace. I got blue, yellow, and burgundy satin, cut it into strips and wrapped that around, hot gluing the ends in place. I bought some lace ribbon and wrapped that on top of the satin, and pinned that in place with 3 "pearl" head pins. I thought I might have to redo this a bunch, but I was really happy with the way they each turned out the first time so that was a plus. 

I also added a silver charm to each of our bouquets: love birds for me, a sand dollar for my beach-loving friend and a book for my book-loving friend. 

Et voila! Three wedding bouquets, better than I had imagined. At least, I think they're great. My best women loved them too so that's a plus, since they're keeping theirs. 


Monday, April 28, 2014

Realistic Rose Free Crochet Pattern

It's been years, actually two years, since I last posted! I've been busy on Ravelry (the best place for the yarn crafter online) but I need to share this.

I wanted to crochet some flowers for my wedding bouquet (yay! I'm getting married!) and, admittedly, I really don't love the look of most crocheted flowers. But then I found a blog post with a gorgeous crocheted bouquet that included THE perfect rose and fell in deep, deep love with the roses she made:

http://www.gantsilyoguru.com/2013/05/they-got-hitched-with-crocheted-bouquet.html?spref=fb


But she wouldn't respond about how she made them/where she found the pattern/if I could buy the pattern from her. So I improvised my own pattern. I've made tons of paper flowers (something I've gotten into since planning my wedding, they're lots of fun!) that have a similar method of construction. So I played around (for weeks) and after incredible disappointment, almost giving up, and renewed determination, this is what I ended up doing:


Yarn: Worsted weight

For EVERY petal: sc in each st around the sides and top to get a nice finished edge.

Small Center petal x 1 (use 3.75mm hook):
Ch 14
1: sc in 2nd ch from hook, sc in each ch across
2-5: turn, ch 1, sc in next st and each st across
6-7: turn, ch 1, sc in next st, hdc in next 2 sts, dc in next st, tc in next 3 sts, dc in next st, hdc in next 2 sts sc in last 2 sts

Medium Petal x1 (size 4mm hook)
ch 8
1: sc in 2nd ch from hook and in each ch across
2: turn, ch 1, sc in each st across, 2sc in last st
3: turn, ch 1, sc in same st as ch 1, sc in ea st across
4: repeat row 2
5: repeat row 3
6-10: turn, ch 1, sc in each st across
11: turn, ch 1, sc dec over next 2 sts, sc in each st across
12: turn, ch 1, sc in each st across, sc dec over last 2 sts
13-15 : repeat rows 11 and 12

Large Petal x 2 (size 5mm hook) *I've made a correction to rows 17 and 18, so if you were having trouble with those, it should work out now*
ch 8
1: turn, sc in 2nd ch from hook and in each ch across
2: turn, ch 1, sc in each st across, 2sc in last st
3: turn, ch 1, sc in same st as ch 1, sc in each st across
4-5: repeat rows 2 and 3
6-16: turn, ch 1, sc in each st across
17: turn, ch 1, sc dec over next 2 sts, sc in each st across
18: turn, ch 1, sc in each st across, sc dec over last 2 sts
19-21 : repeat rows 17 and 18

Weave in ends on each petal (except the center petal, leave a bit of a tail to sew it into a cylinder). Next, it's very important to block the petals before sewing them together. I usually avoid blocking; it's just one extra step that takes time and I just really want to finish, BUT it really helps. If the petals aren't blocked, they're a little flimsy and when I sewed them together they just wanted to roll into each other. And I like to have a bit of space between the petals. All I did to block them was lay them on wax paper, spray them with starch, fold the wax paper over top and squish them flat with a book until they dried. You don't want them to be hard, just a little more sturdy.

Here's what this set looks like, after blocking:
(I cannot get this picture to load so that it's vertical, sorry, but it is supposed to be vertical)

Then the hardest part, really; sew them together. I undid my first one twice before I liked the outcome. I don't have any guaranteed way to sew them together. My only advice: before you sew, hold them all together to get the look you want, that way you see how it can turn out and try to remember that look as you go. Then, after you sew each petal, hold the loose ones together with the sewed ones to double check that you like your progress. It's not a very quick way, but it helps with not having to undo the sewing and start over.

The above petals are the result of my third attempt at making this flower and I really love those petals. Below are the patterns for my second version of the petals, which are slightly more rounded than the third and final version. The finished petals (medium and large) aren't symmetrical when laid flat, but they look great once sewed together. I just wanted a slightly flatter top because the perfect rose mentioned at the start of this post seems to have that.
For the blue flower I posted here, I actually used the above patterns plus one large petal from the following and I think it turned out great.


This is the result of just the petals from the following patterns:


Hook: US H/8, 5.0mm
Yarn: I was told it was worsted, but it's definitely lighter. I'll guess it's about a sport weight.

Small Center petal x 1:
Ch 14
1: sc in 2nd ch from hook, sc in each ch across
2-5: turn, ch 1, sc in next st and each st across
6-7: turn, ch 1, sc in next st, hdc in next 2 sts, dc in next st, tc in next 3 sts, dc in next st, hdc in next 2 sts sc in last 2 sts

Medium Petal x1
ch 8
1: sc in 2nd ch from hook and in each ch across
2: turn, ch 1, sc in each st across, 2sc in last st
3: turn, ch 1, sc in same st, sc in each st across
4: turn, ch 1, sc in each st across, 2sc in last st
5: repeat row 3
6: repeat row 4
5-11: turn, ch 1, sc in each st across
12: turn, ch 1, sc in each st across, sc dec over last 2 sts
13: turn, ch 1, sc dec over next 2 sts, sc in each st across
14-17 : repeat rows 12 and 13

Large Petal x 2
ch 8
1: sc in 2nd ch from hook and in each ch across
2: turn, ch 1, sc in each st across, 2sc in last st
3: turn, ch 1, sc in same st, sc in each st across
4: turn, ch 1, sc in each st across, 2sc in 2nd last st
5-10: repeat rows 3 and 4
11-14: turn, ch 1, sc in each st across
15: turn, ch 1, sc dec over next 2 sts, sc in each st across
16: turn, ch 1, sc in each st across, sc dec over last 2 sts
17-20 : repeat rows 15 and 16


And I made a slightly smaller center petal at one point that I didn't use with my second and third versions of the flower (show here), but if you want to try it and you like it better, great. So here it is:

Slightly smaller center petal x 1 (use 3.75mm hook):
Ch 10
 1: Turn, sc in 2nd ch from hook, sc in each st across, turn
 2-5: Ch 1, sc in next st and each st across, turn
 6-7: ch 1, hdc, dc, tc in next 3 sts, dc, hdc, sc

And, finally, I played around a bit more and ended up with this flower:


I think this is my favourite. For this I used the petal patterns listed first in this post (I referred to them as the third version earlier) :
For the center petal, I used the medium petal pattern but with a 3.75mm hook
I did one medium petal as stated in the pattern (4mm hook)
I did one large petal with a 3.75mm hook
And I did 2 large petals as stated in the pattern (5mm hook)

And now that I've rambled on in an attempt to explain things, let me know if you have any questions!


Wednesday, September 12, 2012

3 months later...

Apparently I just don't crochet enough in the summer! I have made a few things though, but I think the warm weather left the crochet maniac in me uninspired and melting every time I tried to make anything long-term. But it's almost Fall now, and I feel the tug of the yarn and thread lover in me, ready to get back into crocheting for hours on end.

I've started with a project that I've been meaning to make since I first started crocheting (still less than a year ago!). I finally made the victorian-inspired lace bracelet from crochetme.com (http://www.crochetme.com/media/p/112678.aspx).

I used a 1mm steel hook instead of the 1.65mm that the pattern calls for. I like my stitches, whether with thread or yarn, to look nice and tight, so I prefer the smaller hook with the crochet thread. I also used the coral Aunt Lydia's crochet thread, 100% viscose from bamboo; I LOVE this bamboo thread. So soft!

I've got teeny tiny wrists so the bracelet turned out okay for me, but if you're going to use a 1mm hook, it would probably be best to make 1 or 2 extra circles to add some length.

I really hate having to tie a bracelet on, I'm not patient enough to tie a bow with one hand while trying to hold the bracelet in place with the fingers on the hand that it's going to be on. So, I threaded some pretty ribbon through the circles as specified but I tied a bow at one end and sewed it so it wouldn't undo. Then I added a bit of chain and a clasp at the back. I also added a couple little clock hands charms by the bow for a little extra something. I love it. Then I spray starched and ironed it (with my hair straightener, since I don't own a real iron; it worked pretty well :P ), instead of my usual sugar water blocking, because I wanted to keep the softness of the thread.

I'm really happy with the finished product. It was a pretty fast project and really easy to do.

Et voila!


Sunday, June 3, 2012

Crochet Hook Case

A friend of mine was making herself a crochet hook case at one of our crafts nights, and of course this made me want to finally make one for myself. She made hers with some beautiful fabric and sewed it together, but I found a crochet pattern for a case when I first started getting into it and knew I wanted to make it. Also, I just like the fact that I crocheted my crochet hook case :P
Here's the original pattern: http://www.crochetme.com/media/p/94812.aspx

And here's what I made :)


It looks pretty similar but I did change a couple of things. First, I didn't like the "line with holes in the fabric" part, it took up extra time and I didn't think it was necessary to slip stitch the little hook holders. I just made a solid piece of fabric and then sewed the little holders in. And second I didn't do the "Closure" or "Finishing" parts. I just left extra on the ends after sewing in the hook holders, tied some little charms on the ends and I wrap it around and tie a bow to keep it closed.


I do wish that I'd made the little pocket at the bottom a bit deeper, but it still works great.

And there it is, a crocheted crochet hook case (since crochet means "hook" in French, there's a lot of hook in that sentence...)

Friday, April 20, 2012

A Little Pear

I came across the pattern for this tiny pear charm ( http://speckless.wordpress.com/2011/10/16/crochet-pattern-tiny-pear-necklace-charm/ ) and knew I had to make one! So cute!!!!!


And it was perfect timing too, because it goes so well with my new sparkly strawberry!


Love, love, love!

Monday, April 16, 2012

Simple Single Crochet Camera Case

I got two new colours of yarn and was dying to make something with them, and I was also dying to make something to put a little bird applique on....so I made a camera case! The case design is all my own, but the bird is from http://damnitjanetletscrochet.blogspot.ca/2012/01/bird-applique.html - with the exception of my bird's wing. I substituted the heart wing for a more traditional one, inspired by the veined leaf pattern http://windrosefiberstudio.blogspot.ca/2011/08/veined-leaf-free-crochet-pattern.html but adjusted to be slightly smaller (and I'll state how below).


The case was made specifically to fit my camera (a Nikon Coolpix S630) but it could be easily adjusted to fit other sized cameras.

There's a hole in the flap of the case to slide the camera's wrist strap through.


Materials:

Red Heart Soft Yarn, Worsted (medium, [4]), 100% acrylic in Grape (for the body of the case) and Teal (for the bird)
4mm hook for the body of the case
3.25mm hook for the bird (the pattern calls for a 3.5 but I wanted my bird to be slightly smaller)
yarn needle

CASE:

Rnd 1: Ch 30. Join with sl. st.
Rnd 2 - 20: Ch 1, sc in each st. around. Join with sl. st.
Flap, Row 1: Turn the work. Ch 1, sc in each of the next 11 sts. (12 sts. total)
Flap, Rows 2 and 3: Repeat row 1
Flap, Row 4: Turn the work. Ch 1, sc in each of the next 4 sts. Ch 2, sk 2 sts, sc in each of the next 5 sts (the hole for the camera strap is now made - if you don't want this hole, just repeat row 1 again)
Flap, Rows 5-11: Repeat row 1.
Flap, Row 12: Turn the work. Ch 1, sc in each of the next 3 sts. Ch 4, skip next 4 sts, sc in each of the last 4 sts (the button hole is now made)
Flap, Rows 13 and 14: Repeat row 1. Finish off.
Bottom: I wanted the bottom to be flat, rather than just sewing the hole closed, so I improvised a bottom. It's not perfect, but it works; With the camera in the case to easily see the corners, sl st from on corner to another down the long side. Then, sc in the first st next to your sl st along the short side, turn and sc across. Repeat the sc in the next st along the short side, turn and sc across until the hole is closed. (if you have questions I can try and explain it differently...)

BIRD:

Follow the pattern from the link above, but use a 3.25mm hook for a slightly smaller bird.
For the wing:
Ch 7, 3 dc in the second ch from hook, dc in each of the next 2 ch, hdc in next ch, sc in next ch, sl st in last ch. Ch 1 and sl st in same st (you can see this part explained if you follow the link above for the veined leaf). Use the chains on the other side, sl st in the next ch, sc in next ch, hdc in next ch, dc in each of the next 2 ch, 3 dc in next ch (the same one you did the first 3 dc in). Sl st to first dc. Finish off.

Then sew the wing on the bird and sew the bird on the case.
Sew on a button and voila! Camera case complete :)